
STEP 3: Submit the Site Application in ERICA
- After you have prepared the site's customized documents, go to your study in ERICA.
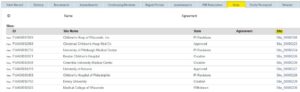
- From the study's main workspace, navigate to the "Sites" tab to see a list of all of your sites. Select the site you want to submit by clicking the link in the "Site" column.
- In the site application, click "Edit Application" and fill out the site application.
- Note the “Responsible PI Preference”. If it says “Responsible Investigator must sign-off” this means the lead PI on the Main Application must approve any submission from the site. So, two PIs will sign off on everything from this site. First, the Site PI submits, then the Responsible PI submits, and the application goes to the UU IRB. To change this, go back to the PSA Workspace, and click “Edit Responsible PI Preferences”.
- Next, in Question #2, enter the Site PI’s information. There are two options to do this.
In the picture below, the section highlighted in green is where you can add PIs who have an ERICA account. This is the recommended method for adding a site PI, as it gives them access to complete and submit their own site application. It also ensures they can receive important notifications from ERICA. How do I get a site PI an ERICA Application?
In the picture below, the section highlighted in pink is where you can list a site PI’s name and email address, without an ERICA application. These fields are just text boxes, so they have no links to any automated processes in ERICA. Individuals listed in this section will not be able to see or access the ERICA application and will not receive notifications. The Responsible PI will be required to submit all applications for the site.
I listed the Site PI in the application, and they have an ERICA account, but they still can’t see the study in ERICA. What went wrong?
If they're logging into ERICA successfully, but a specific study is not showing in their Inbox, it likely means they aren't listed on the application anywhere via the ERICA account they are logged into. Check the email address for the account, and ask the Site PI which email they used to log in. If they don’t match, that means they have more than one ERICA account.To resolve this, the IRB staff can help you submit a ticket to the ERICA team to see if they can combine the accounts, or you can edit the application and add the Site PI via the other account, or the Site PI can try logging in with the other email.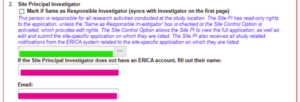
- Attach site-specific documents (e.g. consents, recruitment materials, etc.) to the Documents and Attachments page as appropriate.
- When ready, make sure the site PI and/or Responsible Investigator (i.e. study lead PI) submit the site application to the IRB for review/approval.